The Science Behind Canning
Everyday STEM Trends in STEMDate December 11, 2025
Est. Reading Time 6 mins
Have you ever wondered how a jar of peaches, plums or cherries could taste like they were freshly picked, even during the middle of winter? Canning is a tradition that has been passed on through generations for sustainable food storage, but it wouldn’t be possible without microbiology, chemistry or physics! From gifting homemade jam to pickling vegetables, canning offers a cost-effective way to store foods and develop invaluable STEM skills.
By unpacking the science of successfully canning a variety of foods, STEM and cooking enthusiasts alike can explore how science and culinary practices go hand in hand. Read on to learn the impressive, step-by-step science behind the canning process, find a DIY activity to kick off your own practices at home and discover which notable inventor is connected to canning.
The Science and History of Canning
Prior to the rise of canning, foods were often dried, smoked and salted, or soaked in sugar for preservation. Historically, home canning in the U.S. emerged as a life-sustaining solution during World War I that fulfilled a high demand for food rations. An evolving innovation in food preservation, canned food endured long transport and harsh conditions to reach American soldiers. From community canning clubs to “war gardens,” a term later changed to “victory gardens,” the National War Garden Commission created educational resources to increase patriotic efforts in home front canning. Continuing throughout the Great Depression, canning soared during World War II with over 4.1 billion jars canned in homes and community canning centers. Popularized again in the 1970s, canning made a comeback as a result of DIY movements and with even greater safety efficiency.
Today, canning is a tried-and-true process that combines heat and an airtight seal to keep food fresh and safe for consumption. The primary goal of the science behind canning is to prevent any bacteria from spoiling food. Every canning session is filled with STEM learning. So, let’s explore how it works!
- Canning Preparation
First, jars are cleaned and then filled with fruits, vegetables and even homemade sauces. Yum! For optimal preparation, it’s important to use fresh ingredients and taste test the food beforehand to ensure future enjoyment.
- Heating Treatment
Canning involves a signature heating process that eliminates microorganisms that can spoil food. There are two kinds of heating treatments that depend on the acidity, or pH level, of the food, which is determined by chemistry.
- Boiling water bath: High-acid foods like fruits, pickles or tomatoes can be processed by submerging the jar in boiling water.
- Pressure canning: For low-acid foods like most vegetables or meats, a pressure canner must be used to achieve a temperature of 250 degrees Fahrenheit. A pressure canner is a sealed, kettlelike appliance that when heated builds pressure inside and increases the temperature. During this thermal treatment process, the air and food inside the jar expands, and steam begins to escape the through the lid.
- Boiling water bath: High-acid foods like fruits, pickles or tomatoes can be processed by submerging the jar in boiling water.
- Creating an Airtight Seal
As the jars cool, the air inside begins to shrink, with the contracting steam pushing the lid down tightly to create a vacuum seal. Why is this part so important? Vacuum seals prevent contamination, or microorganisms and enzymes, from entering. This is what extends the shelf life of the food!
- Safe Storage
As a rule of thumb, canned foods should be safely stored in a dark, cool and dry place. And it’s important to label and date any canned goods!
Try DIY Canning and Pickling
New to the science of canning? There are plenty of ways to spark interest in this sustainable practice. DIY canning is a fun activity for the whole family! It involves creativity, collaboration and experimentation.
As a first step, consider inviting STEM into your kitchen as you explore the way science adds flavor to your favorite dishes with this homemade quick-pickle recipe.
Materials Needed
- 1 cup water
- 1-2 tablespoons salt
- 1/3 cup apple cider or white vinegar
- 2 tablespoons sugar (optional)
- Bowl, medium sized
- Onion or green onion, sliced
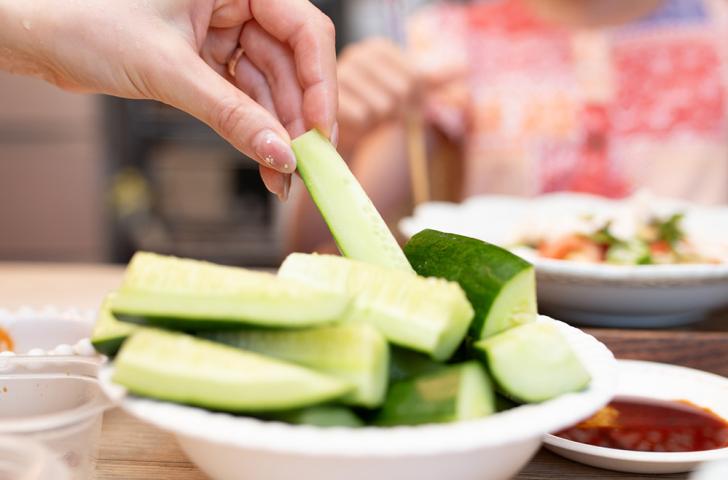
- Small cucumbers, sliced
Step-by-Step Instructions
- In a medium-sized bowl, add sliced cucumbers, water, salt, vinegar, onion and optional sugar. As you add each item, notice what happens to it in the bowl.
- Use a mixing spoon to stir everything together and observe what the ingredients look like in the bowl once they begin to mix together. Did they change? How so?
- Cover the bowl and refrigerate for 30 minutes. When time is up, observe the bowl’s contents for any changes.
- Sample your quick pickles. Can you taste all the different ingredients in the solution?
Whether you try pickling carrots, cucumbers or onions, experimenting with food is a creative adventure. If your family enjoys this activity, why not try canning too? From sweet and savory salsas to fruit preserves and pie fillings, canning gives everyone the chance to be a food scientist with an artistic twist.
The Inventor Behind Canning
The safety and convenience of home canning wouldn’t be possible without innovation.
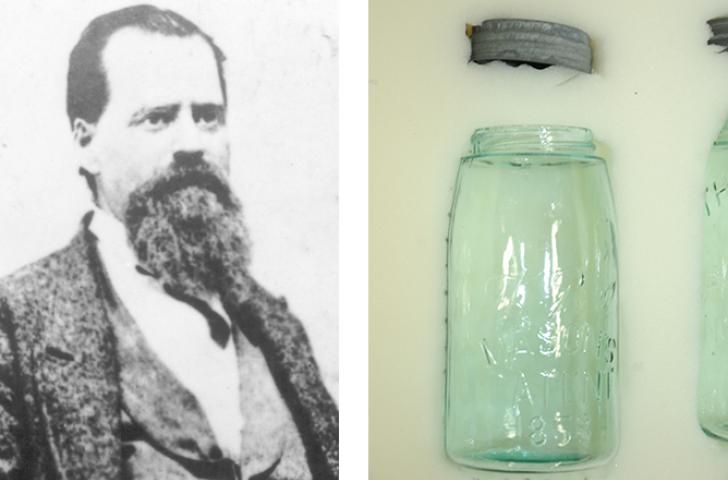
National Inventors Hall of Fame® Inductee John L. Mason invented and patented the first glass jar with a screw-on cap in 1858. Born in 1832 in New Jersey, Mason worked as a tinsmith. He earned more than 40 patents in his lifetime, but he made his most significant impact when he focused on making improvements to the process of canning — a process that was relatively new at the time.
Earlier home canning methods involved using wax to create an airtight seal. The process was rather messy and unreliable for longer-term food preservation. To address this, Mason created a threaded screw-top jar that was designed to be both airtight and watertight. Mason’s jar also had a rubber ring under the flat metal lid, making a strong and lasting vacuum seal possible without the use of wax.
Unfortunately for Mason, though he patented his jar design, he did not patent the rubber ring that played an essential role in making his jars so effective. Without this critical protection of his intellectual property, mason jars were then widely produced by others. The most recognized of these manufacturers is the Ball Brothers Manufacturing Co. Now the nation’s biggest producer of mason jars, Ball’s earliest jars read “Mason’s Patent 1858.”
Mason’s airtight jar design made a major impact by allowing for urban populations to take advantage of fresh produce. Still a popular product today, mason jars are affordable and re-useable, allowing for the preservation of garden or farm produce such as tomatoes, pickles, fruits and relish for use throughout the year.
Explore More STEM
As you discover vibrant colors and delicious flavors, we hope you make new connections to STEM as you practice canning foods. Want to find more of the extraordinary ways STEM shapes the world around us? Keep exploring our blog to learn more.